A harsh day's night
How often have we not, as photographers seeing an appealing scene, wished for better lighting? We all know that landscape photos are usually best captured at or around sunrise or sundown. But sometimes we may not have the opportunity, for one reason or another, to be at the scene at those times. So, what can we do - pack up and go home, or try out a little magic in Photoshop?
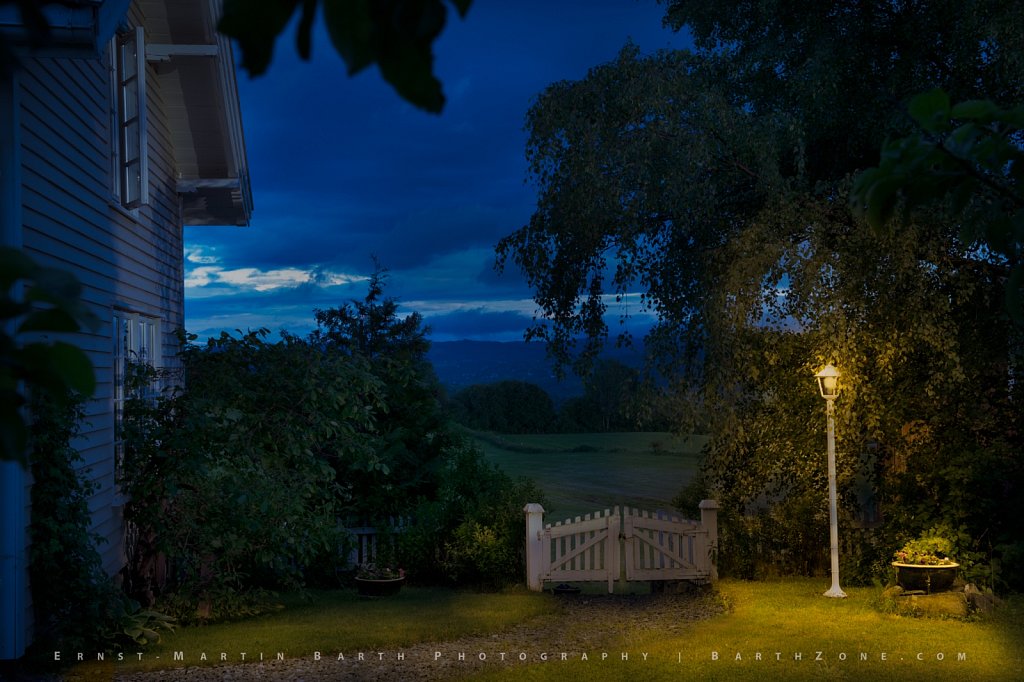
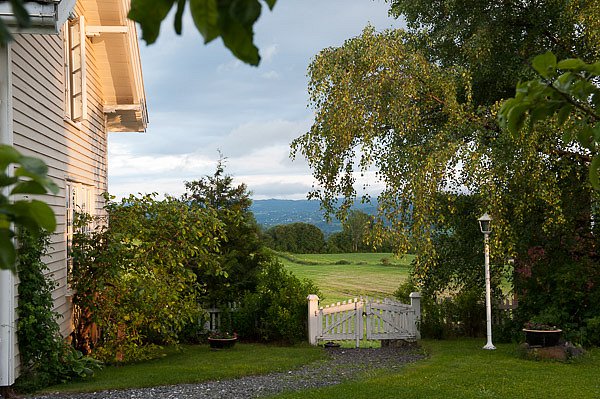
With this photo from our garden, taken on a summer evening, I decided to take things one step further - to turn day into night. Even if the light is not really as harsh and contrasty as it might have been at noon, I will, nevertheless, use this as an example of what may be done with uninteresting daylight images using Photoshop. Photoshop CS6 and up is recommended, since this is the version where Adobe included Camera Raw as a filter. Older versions of Photoshop will also work, but colour temperature changes must be done in Camera Raw on duplicates of the file, and then imported into the layer stack.
For this procedure to work best, use a RAW capture, as indicated above. JPEG images are not recommended for this treatment. RAW gives the most flexibility when changing exposure and colour temperature, as will become apparent further on. Besides, if you are serious about your photography you know you should stick to capturing RAW images whenever you can. Begin by loading the image into Photoshop and make a duplicate of the background layer. Then go to Filter/Camera Raw Filter and drag the temperature slider to the left to turn the layer into a bluish, monochromatic image, and drag the exposure slider to the left making the scene look like night. Experiment with colour temperature and exposure to find the most pleasing result. Settings will vary from photo to photo.
Now, make another copy of the background layer. Drag this to the top of the stack and once again go to the Camera Raw Filter. This time drag the temperature slider over to the right giving the entire scene an overall yellow tint. Additionally, you may go to the HSL/Grayscale tab within the Camera Raw Filter and adjust the yellow, orange and red components to achieve the most pleasing light. This will then become the colour of the lamplight that we will introduce to light the scene. Add a layer mask to the top (yellow) layer, and fill it with black, hiding the yellow light. Now, with a soft brush, set to a low opacity, start painting with white on the mask to reveal the lamplight illuminating the scene, varying the brush strokes and opacity, as well as the size of the brush, as you go. The final result may look like the image below. For a much more detailed and illustrative explanation of this technique, go to photographer Glyn Dewis' blog and watch his video here.